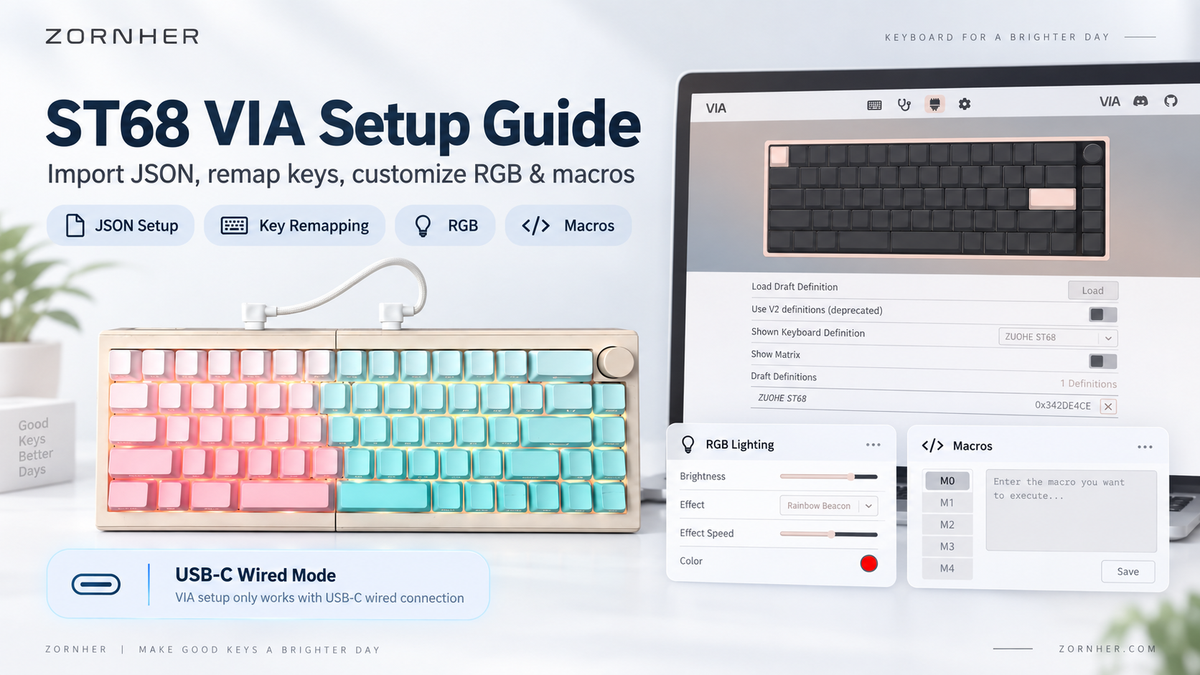
This guide explains how to set up your ZORNHER ST68 with VIA, including importing the JSON file, connecting the keyboard, remapping keys, customizing RGB lighting, creating macros, and restoring the factory settings.
Important: VIA configuration only works when the ST68 is connected using the USB-C wired mode. Bluetooth and 2.4GHz modes can still be used for everyday typing, but they cannot be used to configure the keyboard in VIA.
ST68 VIA Driver Setup Guide
Use USB-C wired mode to customize your ST68 keyboard with VIA.

Before You Start
Before using VIA with your ST68, prepare the following:
• ZORNHER ST68 keyboard
• USB-C data cable
• Windows or macOS computer
• Google Chrome or Microsoft Edge
• Official ST68 JSON file
• Stable internet connection
VIA setup requires a USB-C wired connection. Bluetooth and 2.4GHz modes cannot be used to configure the keyboard.
Important note:
The ST68 driver customization only works in USB-C wired mode.
Bluetooth and 2.4GHz wireless modes are for daily typing and cannot be used for VIA driver setup.
Open VIA
Open your browser and visit:
We recommend using Microsoft Edge or Google Chrome for the best compatibility.
If your browser supports automatic translation, you may turn on translation to make the interface easier to understand.

Enable the Design Tab
When you enter VIA for the first time, the default page may not show the JSON import option.
Click the settings icon and enable the Design option.
After enabling it, a new icon will appear in the top navigation bar.
You only need to do this setup once.

Import the ST68 JSON File
Click the brush icon / Design tab.
Then import the ST68 JSON file provided by ZORNHER.

After the JSON file is imported successfully, VIA will display the ST68 keyboard configuration interface.

Connect Your ST68 Keyboard
Keep your ST68 keyboard connected to your computer using the USB-C cable.
Then go to the connection page in VIA and click the connect button.
Choose ZUOHE ST68 from the device list.
After the connection is successful, VIA will display the ST68 keyboard layout.

Once connected, you can start customizing the ST68 keyboard.

Choose the correct layer
The ST68 uses different layers for Windows and macOS:
• Layer 0 and Layer 1: macOS
• Layer 2 and Layer 3: Windows
Make sure you edit the correct layer for your operating system. Changes made to the wrong layer may not work when you return to normal typing.

Important:
If you change too many settings or want to restore the original layout, you can reset the keyboard to factory settings.
Default factory reset shortcut:
FN + Backspace
Hold for about 3 seconds.
Remap Keys
The key remapping page allows you to change the function of each key.
You can select a key on the keyboard layout, then choose a new function from the available categories.
Common key function categories include:
- Basic keys
- Media controls
- Macros
- Layers
- Special functions
- Lighting controls
- Custom settings

Please note:
The basic key mapping page is mainly used to change keyboard input functions.
If you want to adjust lighting effects, please use the lighting section instead.
Customize RGB Lighting
The lighting section allows you to adjust the ST68 keyboard lighting.
You can customize:
- Brightness
- Lighting mode
- Lighting speed
- Single-color backlight

If your lighting settings are not saved, make sure the keyboard is connected in USB-C wired mode and apply the changes again.
Create and Assign Macros
The macro section allows you to create and assign macro commands.
The ST68 VIA driver supports up to 15 macro actions.
To edit a macro:
- Open the macro section.
- Select a macro slot.
- Click the edit button.
- Record or enter your macro command.
- Assign the macro to a key.
- Save your settings.

Note:
Macro recording should be done in full-screen mode for better compatibility.
Save or Load Your Layout
After customizing your ST68 keyboard, you can save your layout as a JSON file.
This is useful if you want to back up your layout or use the same settings again later.
Available options include:
- Save current layout
- Load layout
- Export your custom JSON file
- Import an official or previously saved JSON file

When you click save/export, VIA will generate a JSON file based on your current keyboard settings.
When you click load/import, you can select a previously saved JSON file or an official ST68 JSON file.
Troubleshooting
If VIA cannot detect your ST68:
• Confirm that the keyboard is connected with a USB-C data cable.
• Use Google Chrome or Microsoft Edge.
• Try a different USB port or USB-C cable.
• Refresh the VIA website.
• Import the official ST68 JSON file again.
• Disconnect and reconnect the keyboard.
• Restart the browser.
To restore the factory settings, press and hold FN + Backspace for approximately three seconds.
Frequently Asked Questions
Can I configure the ST68 in Bluetooth mode?
No. VIA configuration requires a USB-C wired connection. Bluetooth mode can be used for normal wireless typing after configuration.
Can I configure the ST68 in 2.4GHz mode?
No. Connect the keyboard with a USB-C data cable before using VIA.
Why do I need the ST68 JSON file?
The JSON file allows VIA to recognize the ST68 layout and display its available keys, layers, lighting controls, and functions correctly.
Which layer should I edit?
Use Layer 0 or Layer 1 for macOS. Use Layer 2 or Layer 3 for Windows.
How do I restore the factory settings?
Press and hold:
FN + Backspace
Hold for about 3 seconds to restore the default factory layout.
Final Notes
The ST68 keyboard supports Bluetooth, 2.4GHz wireless, and USB-C wired connection for daily use.
However, VIA driver customization only works in USB-C wired mode.
To customize your ST68 keyboard, please follow this order:
- Open
https://usevia.app/ - Enable the Design tab
- Import the ST68 JSON file
- Connect the keyboard with USB-C cable
- Select ZUOHE ST68
- Customize keys, layers, RGB, and macros
- Save your layout
If you still need help after following this guide, please contact ZORNHER Support. Include your order number, keyboard model, operating system, connection mode, and a screenshot of the issue so our team can assist you more efficiently.


コメントを書く
このサイトはhCaptchaによって保護されており、hCaptchaプライバシーポリシーおよび利用規約が適用されます。